Chocolate, often referred to as the food of the gods, plays a big role in our lives. We turn to it for comfort, energy and reward. For me, learning about chocolate over the past 15 years (along with wine, coffee and olive oil) has been a revelation.
I grew up in a pub-cum-grocery shop where, in the 1960s, olive oil was in the toiletry section. Chocolate bars were sold in both the shop and the bar, and I stole and consumed vast quantities of them.
Fast-forward 30 years and I’ve discovered Willie Harcourt-Cooze’s chocolate, books and incredible knowledge. Through him I’ve experienced a true education and now know that all those bars I gobbled as a child had very little in common with real chocolate.
So here is a brief history of the chocolate we have been consuming: it was first used as a currency, and then drunk only by the very rich. It was made into bars in the 1850s by Joseph Fry and John Cadbury, followed by Henri Nestlé, who added condensed milk to create milk chocolate, and finally by Rudolphe Lindt, who invented a machine called the conch, which mixed chocolate to a smooth consistency. Raw chocolate is known as cocoa or cacao and comes as raw cacao nibs or as powder. The bean has an intense, bitter taste and is fermented to develop the flavour. It’s then dried and roasted before being made into a bar.
After learning all of these fascinating facts, and taking part in multiple tastings, I decided to sell Willie’s chocolate in the restaurant – and found myself pilfering my own stock this time round.
Sticky chocolate ribs
This recipe, adapted from Willie’s second book, is a lovely simple meal that doesn’t force you to charr them too heavily.
6tbsp tomato puree
2tbsp harissa
2tbsp grated cacao
2tbsp olive oil
2tsp honey
Pinch of salt
About 1kg ribs
Put all the ingredients except the ribs in a small pan and put on a medium heat. Stir occasionally until thick and glossy. Leave to cool.
Pour the sauce over the ribs, making sure they are evenly coated, and leave to marinade for at least an hour – longer if possible.
Now you have a choice: you can cook them over a medium barbecue for 20 minutes or you can heat the oven to 180 degrees and cook for 20-30 minutes, depending on their size. Remember to turn them frequently and brush them regularly with the sauce.
Serve with a salad of your choice dressed with lemon juice.

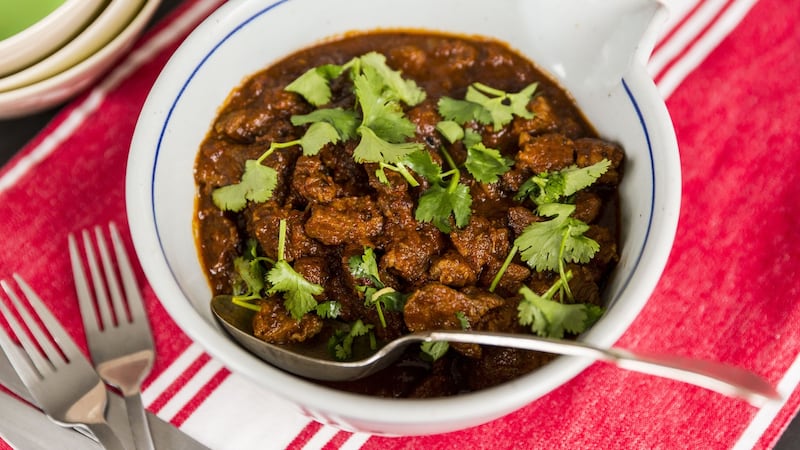
Chilli con carne with chocolate
I’ve been using Jane Grigson’s recipe for chilli for 30 years, but when I discovered the benefit of adding chocolate to a dish it changed the way I prepare this old favourite. I’m not a fan of kidney beans but feel a chilli is not a chilli without them, so I follow Grigson’s advice and serve this with a salad of three beans – kidney, haricot and butter beans – with lots of parsley, lemon juice and olive oil.
For the chilli con carne
500-725g stewing beef, cubed very small
Salt and pepper
Olive oil
1 large onion, chopped
1 small green pepper, diced
Colorado sauce (see recipe below)
50g cacoa/dark chocolate
1tbsp tomato concentrate
2-3 cloves of garlic, crushed
1tbsp ground cumin
Brown sugar to taste
For the Colorado sauce
6-7 small dried red chillies, or 4-5 large fresh ones
1 large red pepper
1 large onion, chopped
1 large garlic clove
To make the Colorado sauce
If the chillies are dried, soak them in a little water for an hour, then slit them and wash out the seeds. Discard the stalks.
Remove the seeds from the pepper and puree with the rest of the ingredients, using the chilli-soaking water if necessary to moisten the mixture. If you use fresh chillies you might need a tablespoon or two of cold water.
You can keep this sauce in a covered container in the fridge for two days, or you can freeze it.
To make the chilli
Take a bowl and add the meat with enough oil to coat it, along with some salt and pepper. Heat a large frying pan and brown the meat in batches, transferring it to a saucepan as you go.
In the same frying pan, cook the onions lightly, and then add to the meat.
Add the green pepper, Colorado sauce, cacoa and just enough water to cover the ingredients. Cover lightly and leave to stew until cooked – about an hour – making sure you are keeping the heat low. Check the liquid level occasionally. By the end of the cooking time it should have reduced to a thick brownish-red sauce. If it reduces too soon because the lid of the pan is not a tight fit, or you had the heat too high, top it up with water.
Add the tomato puree, the cumin and the garlic, with a little more salt if needed, along with a pinch of brown sugar to taste.
Simmer for a further 15 minutes, correct the seasoning and serve with rice and a three-bean salad.

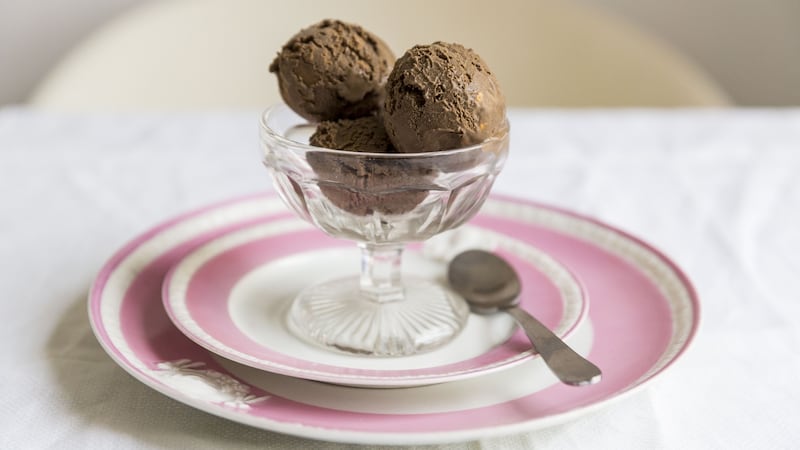
Chocolate nori ice-cream
I hesitate about giving recipes for ice-cream, as it can be a bit of a faff to make. This one is no exception: it involves making a sugar syrup and whisking it, while still hot, into eggs. Also, if one isn’t lucky enough to own an ice-cream maker and not blessed with patience, the whole process becomes a drag. It’s worth considering investing in an ice-cream maker but be sure to avoid the machines where you have to freeze the bowl, as you will get tired of it very soon.
That said, this is a great recipe that really is worth the effort. The addition of seaweed enhances the flavour of the chocolate and adds a delightful chewiness at no health cost (unlike cruelly delicious caramel).
Serves 8
200g sugar
100ml water
5 medium egg yolks
200g good dark chocolate
250ml full-fat milk
250ml double cream
2 sushi nori sheets (about 6g) or dried nori flakes
Put the water into a small heavy-based saucepan and add the sugar, stirring it well to help the sugar dissolve. Place a jam thermometer in the pan, then bring it up to the boil and boil vigorously until the mixture reaches 120 degrees, or hard-ball stage. This will take about 6 minutes.
Using an electric mixer, beat the egg yolks until thick and creamy. As soon as the sugar syrup reaches 120 degrees, turn the mixer to its highest setting and pour a thin, slow stream of the just-boiled syrup into the egg yolks as you whisk. The egg yolks will gradually expand into a thick pale creamy mousse – keep whisking until it is really thick. Set aside.
Break the chocolate into a large bowl and set it over a large pan of just-boiled water. Stir occasionally until the chocolate has melted. You may need to replace the hot water once.
Meanwhile, put the milk and cream in a saucepan and bring up to just below boiling point. It should be just a little hotter than the chocolate. Using a wooden spoon, stir the hot milk and cream into the chocolate bit by bit. Once all the chocolate is melted into all the milk, transfer to a jug and chill in the fridge.
If using the nori sheets, take a pair of scissors and finely cut the nori into tiny fragments. Otherwise, just add the dried nori flakes to the chocolate once it is tepid, then whisk the mixture into the egg mousse. Some of the nori will stick to the whisk, but scrape it off and return it to the mixture.
Pour into your ice-cream machine and churn according to the manufacturer’s instructions. Alternatively, pour into a shallow container, freeze and, after the first hour, beat again in the electric mixer until nice and smooth. You might need to repeat this at least once until you have a smooth texture. Freeze until set.


